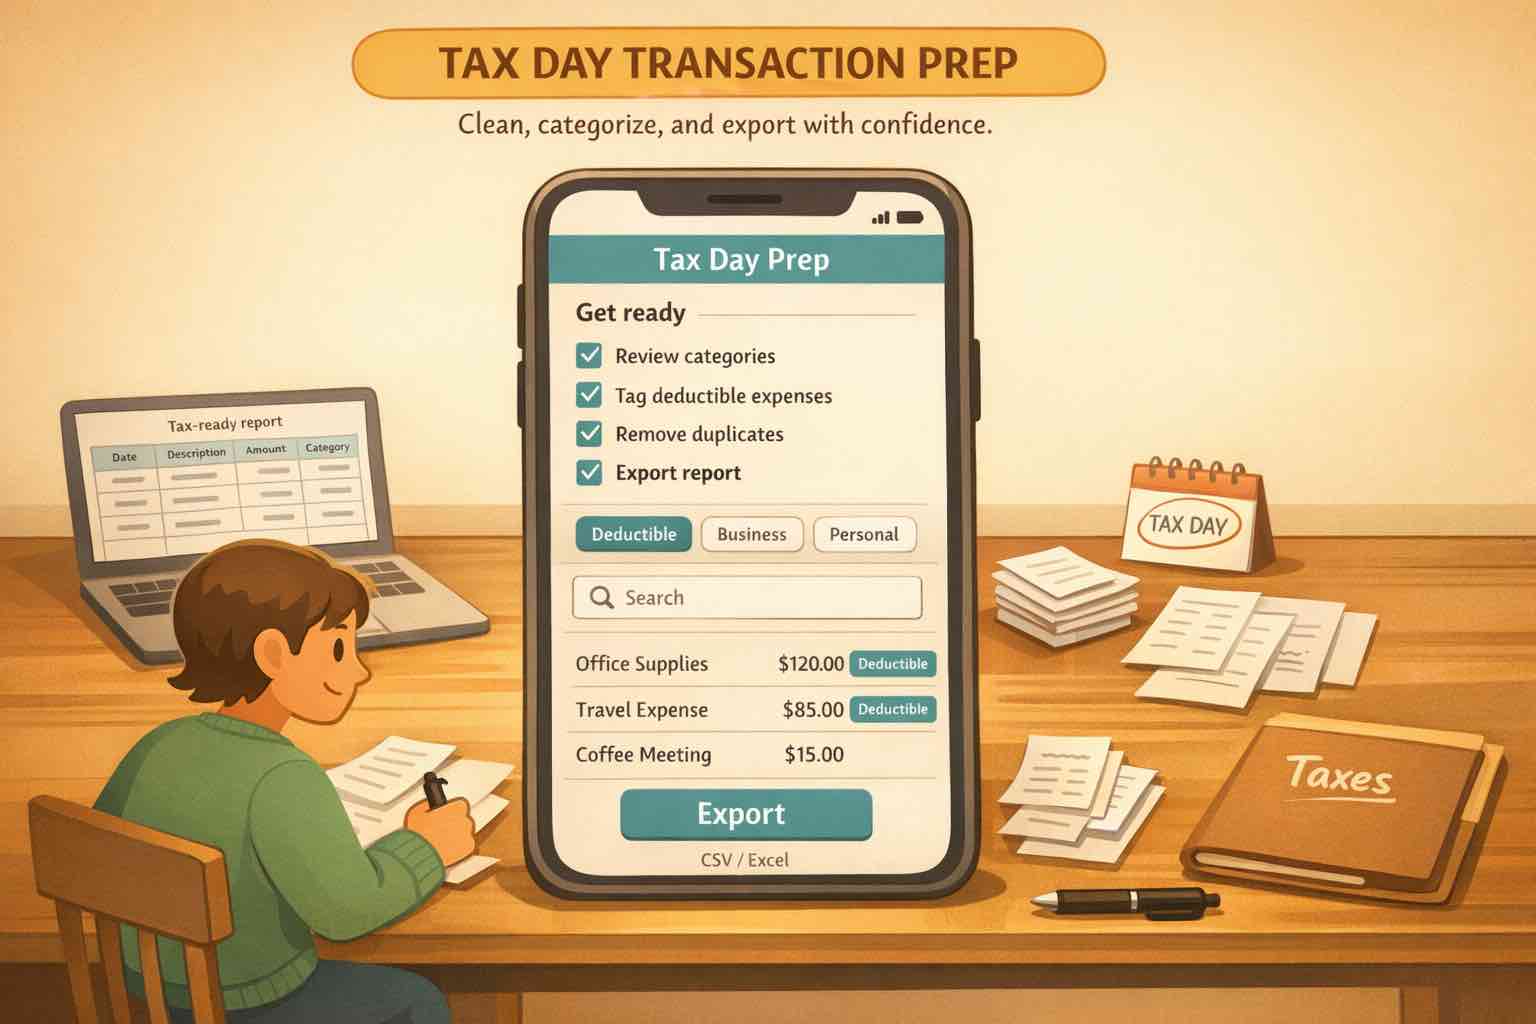
Use CSV imports to catch up old transaction history, auto-categorize transactions, and hand off a usable file for tax prep.
At a glance
If you need categorized transactions for tax filing, the fastest path is usually not rebuilding everything in a spreadsheet. It is importing your bank and credit card CSVs into Koody, letting Koody auto-categorize the transactions, reviewing the results, attaching the relevant receipts or invoices, and exporting the exact date range you need.
Most people are not looking for a full accounting overhaul. They just need their transaction history in one place, clean enough to hand to an accountant or organized enough to support what goes on the return.
The usual problem is not a lack of data. It is that the data is scattered across checking accounts, credit cards, old budgeting apps, spreadsheet exports, screenshots, and a drawer full of receipts.
This is where Koody's import tools are genuinely useful. You can bring CSVs and statement exports into one place, fix the categories in bulk, keep receipts attached to the right transactions, and then export a filtered file for your accountant.
And if the proof you need is not a paper receipt, that is fine too. Koody can keep supporting files such as PDF invoices, email screenshots, and other uploadable proof attached to the matching transaction, so your categorization work and your documentation stay together.
This is for organizing records, not tax advice. Your accountant or tax preparer decides what belongs on the return. Koody helps you get the categorized paper trail into a form a human can actually work with.
Important: Koody is a budgeting app, not an accountant, tax preparer, or law firm. Use it to import, clean, categorize, and organize transaction data. A qualified tax professional should decide how that data is used for filing, deductions, or IRS responses.
Why organized transactions matter for tax filing
Tax-time chaos usually starts with one of four situations:
You tracked part of the year, then fell behind.
Your useful history is sitting in bank or credit card accounts, not in your budget.
Your accountant asked for categorized transactions, not screenshots and rough guesses.
You need records ready in case you have to support items on your return later.
A good import process solves those problems by turning raw statement data into something reviewable. Dates line up, categories become usable, transfers stop muddying the picture, and your receipts or notes live closer to the transactions they explain.
That matters because tax prep is often less about discovering numbers and more about organizing proof. The IRS itself emphasizes keeping records to track expenses, prepare returns, and support items reported on them.
Before you start
The cleanest tax-prep catch-up starts before you upload anything.
Gather:
One transaction-level CSV per bank account or credit card.
A clear date range for the tax year or period you are catching up.
Any receipts, screenshots, or notes for expenses your accountant may ask about.
Exports from older budgeting apps, if that is where some of the year still lives.
If your bank offers CSV and Excel, choose CSV first. If the institution only gives you a spreadsheet, save it as CSV before uploading. Try to avoid summary reports because they usually leave out the transaction-level detail you need for categorization and follow-up questions.
It also helps to keep one file per account. Do not combine checking, savings, and two credit cards into one giant sheet unless you absolutely have to. Separate files make the import destination obvious and keep cleanup far easier.
Step 1: Import one account at a time
Start with the account that matters most for tax prep, usually your main checking account or the credit card where most business or deductible spending happened.
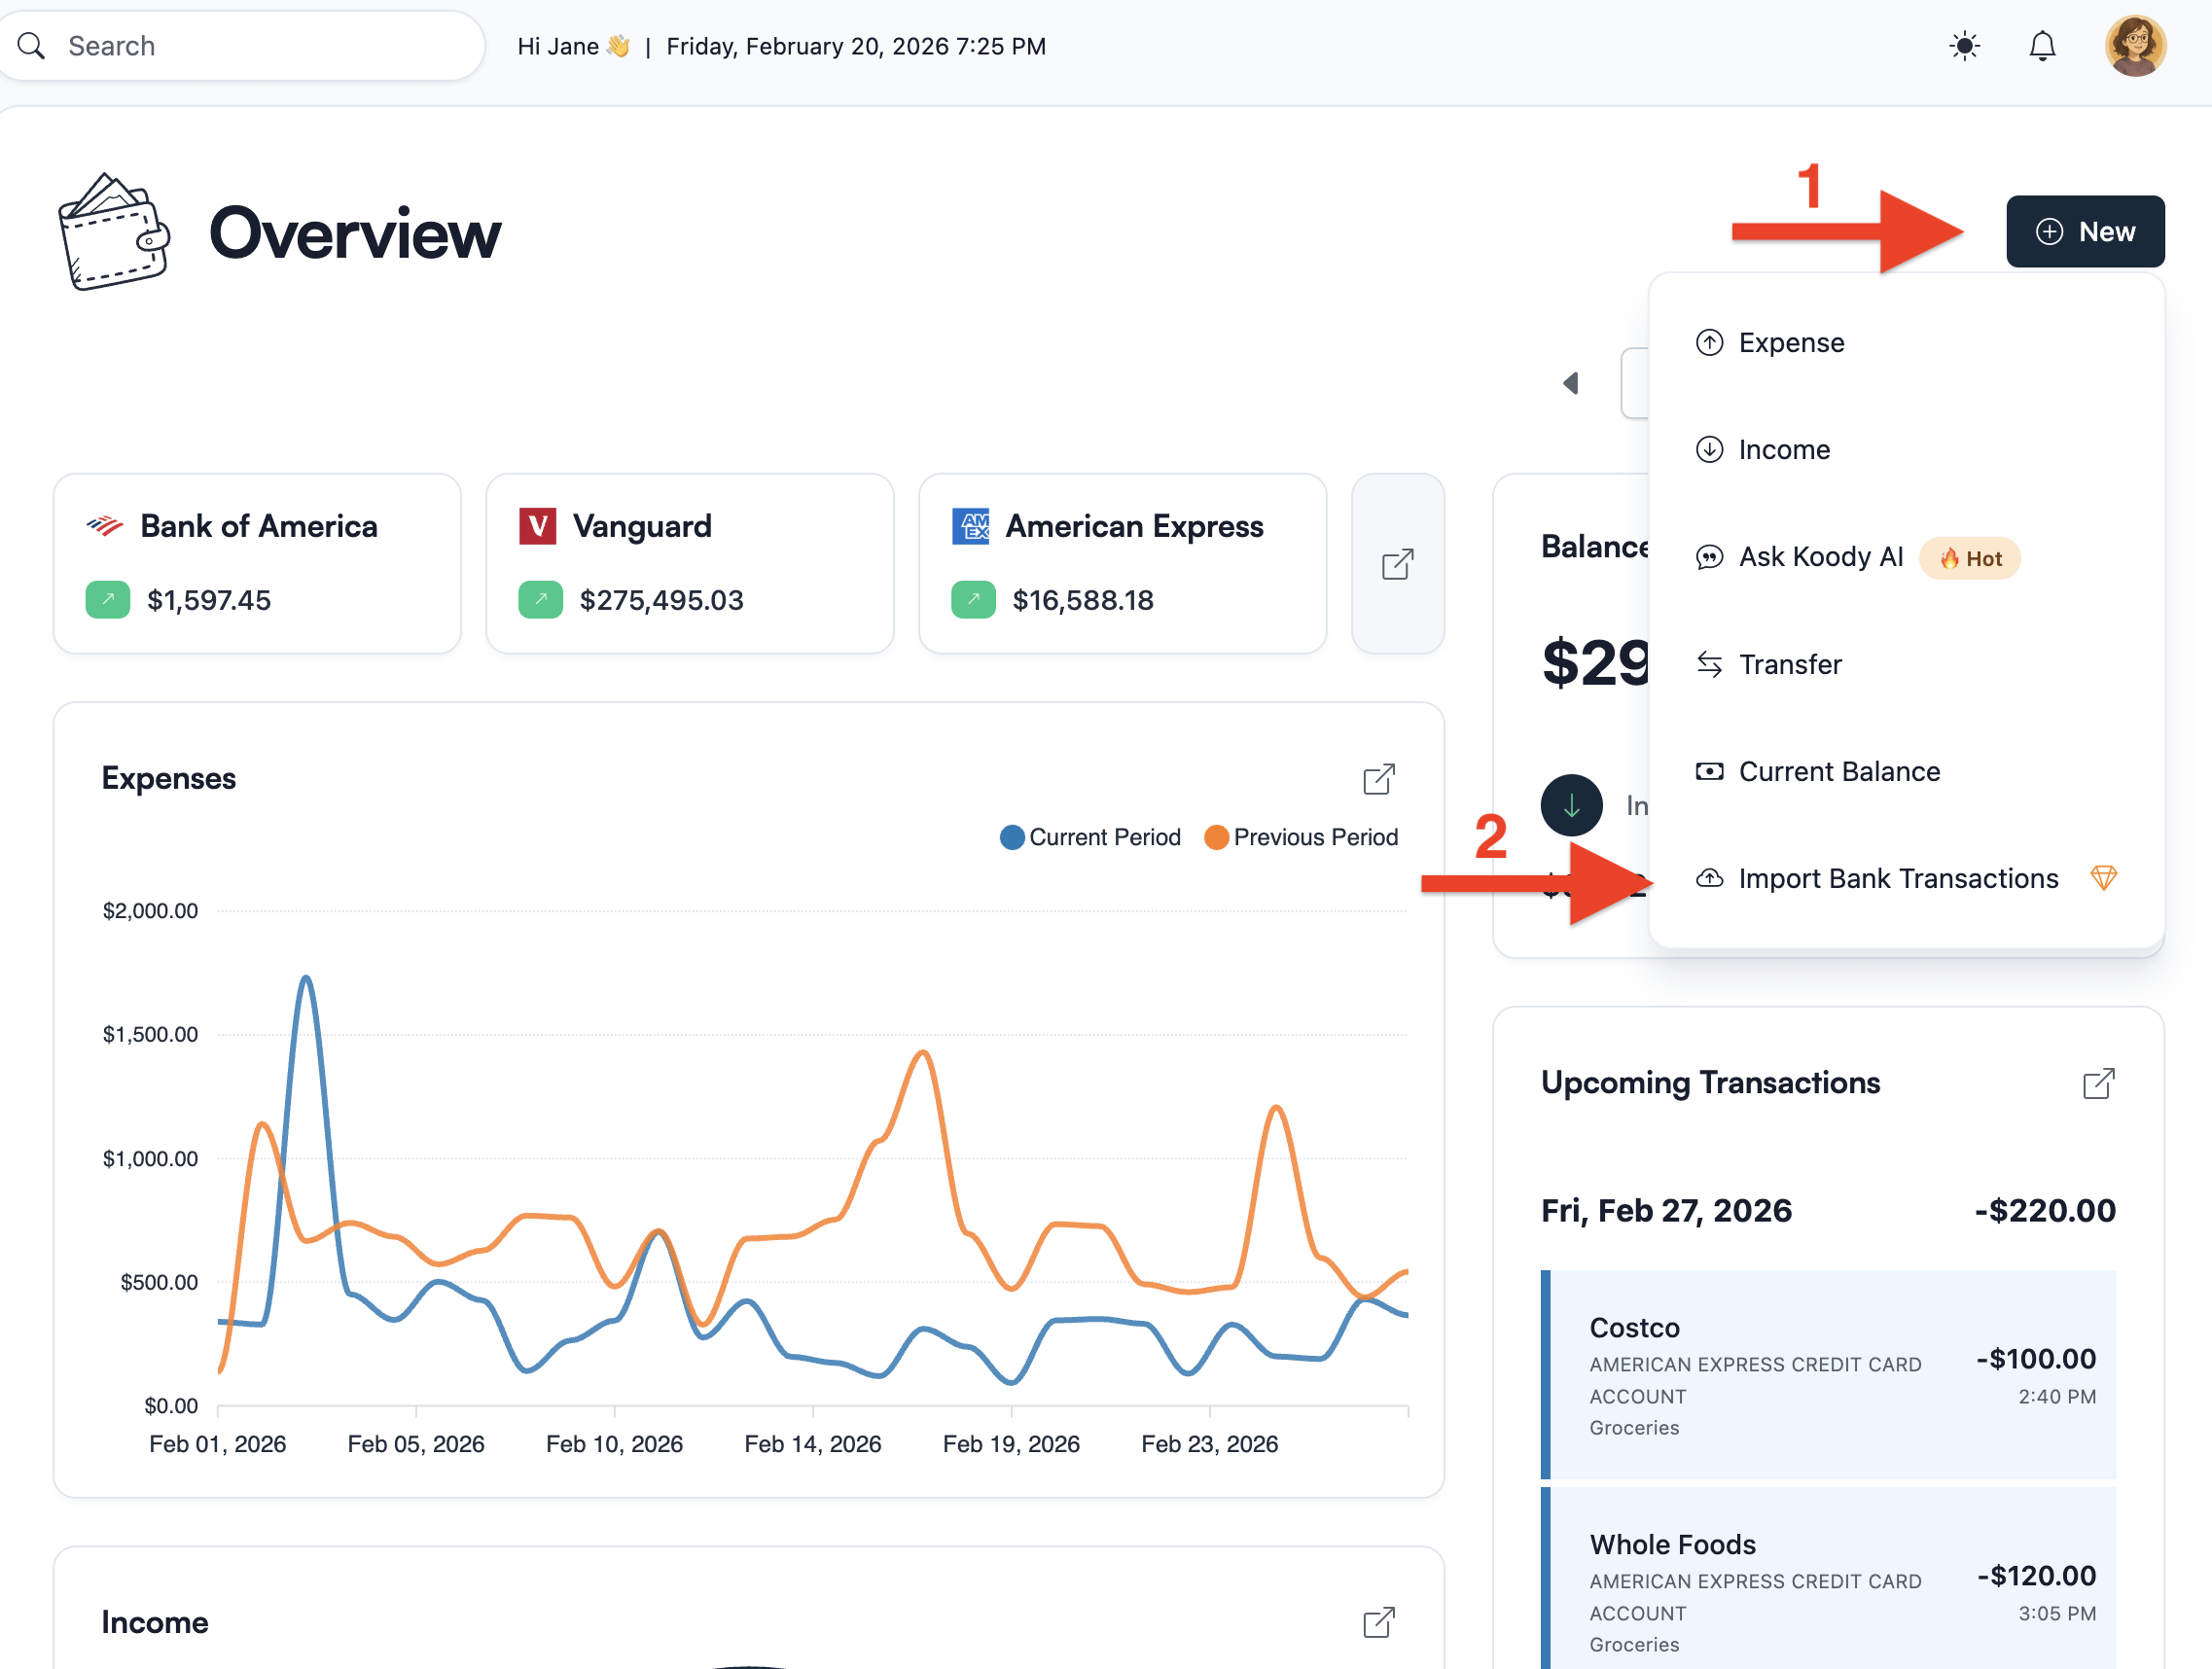
In Koody, go to Overview > New > Import Bank Transactions, pick the destination account, upload the CSV, and let Koody process the file. If the account does not exist yet, create it first so future imports for that bank or card always land in the same place.
Koody handles common CSV mess automatically: inconsistent dates, noisy descriptions, duplicate header rows, and the usual formatting friction that comes with bank exports. If the file structure is unusual, Koody falls back to a quick column-mapping step rather than failing the whole import.
Start from Overview and import each bank or card file into the matching Koody account.
If tax-season spending mostly lived on cards, do not merge those card CSVs into checking first. Import each card separately and keep card payments distinct from actual purchases. Our credit card import guide goes deeper into that card-specific cleanup.
Plan note: bank statement imports are in Koody's Plus plan. If you are importing more than a short recent window, the Plus plan also removes the history cap, so older years do not get stranded halfway through cleanup.
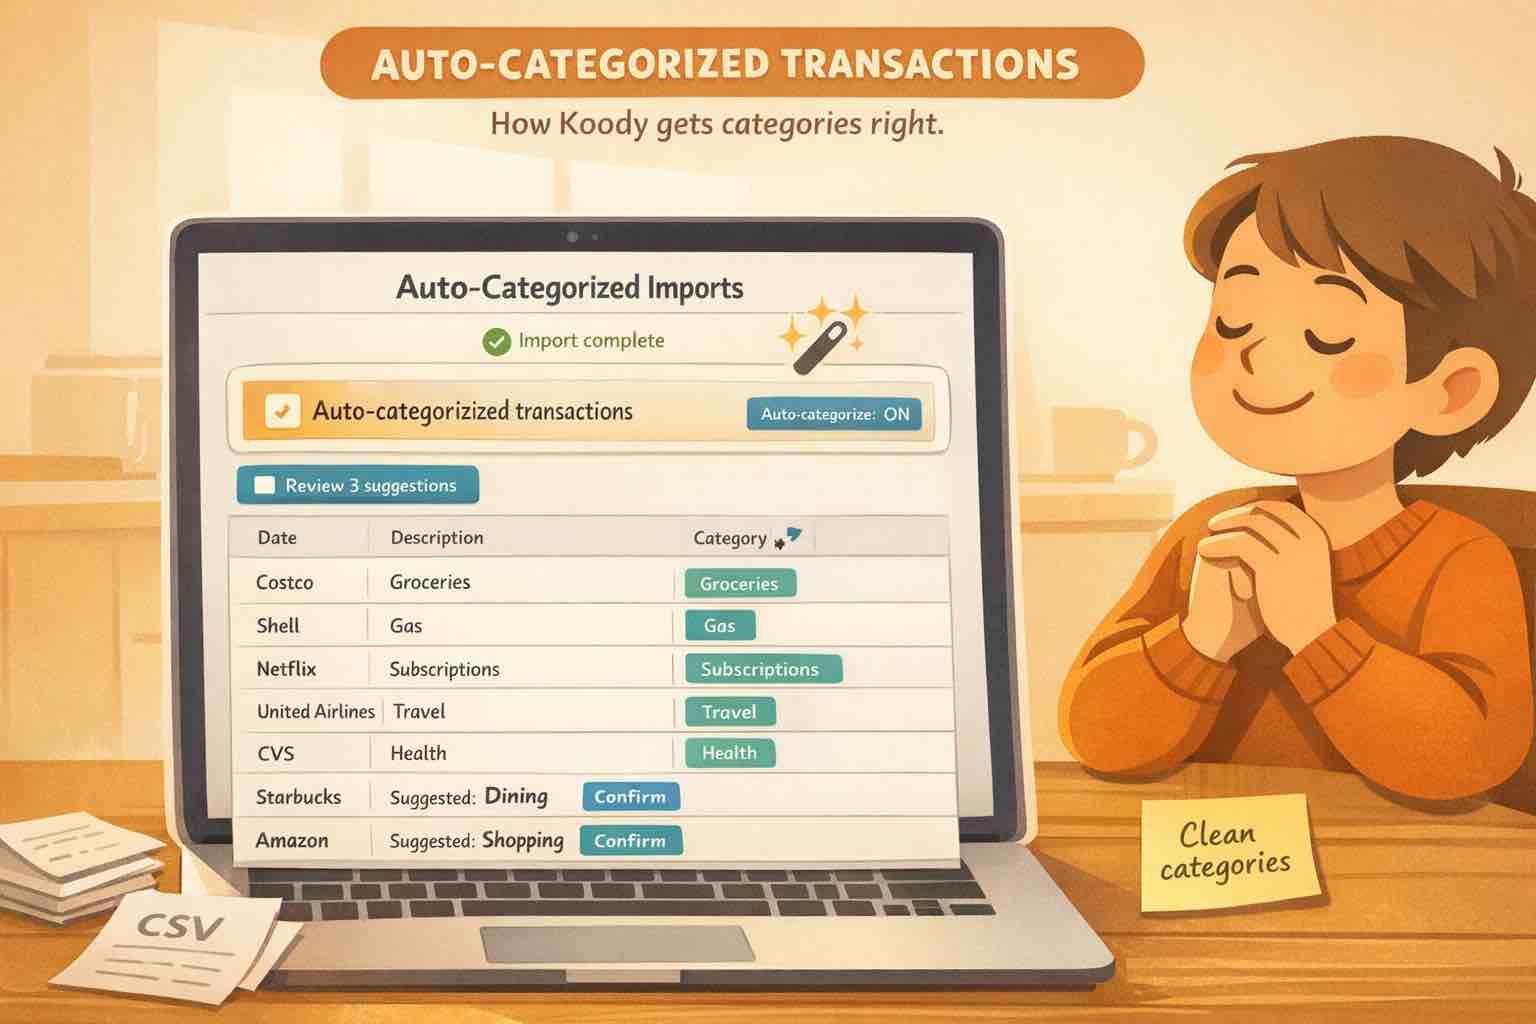
Step 2: Categorize transactions for tax filing
Importing is the catch-up step. Categorization is what makes the export useful.
The import results screen gives you a fast read on what came in before deeper category cleanup.
After upload, review the transactions with tax prep in mind:
Fix broad groups of merchants with bulk edit instead of one row at a time.
Review transfers and credit card payments so they do not read like deductible spending.
Normalize merchant names so your accountant is not staring at bank shorthand and processor codes.
Keep or refine existing categories if your CSV already contains them.
Koody auto-categorizes imported data to give you a strong first pass, then lets you clean up anything that still looks off.
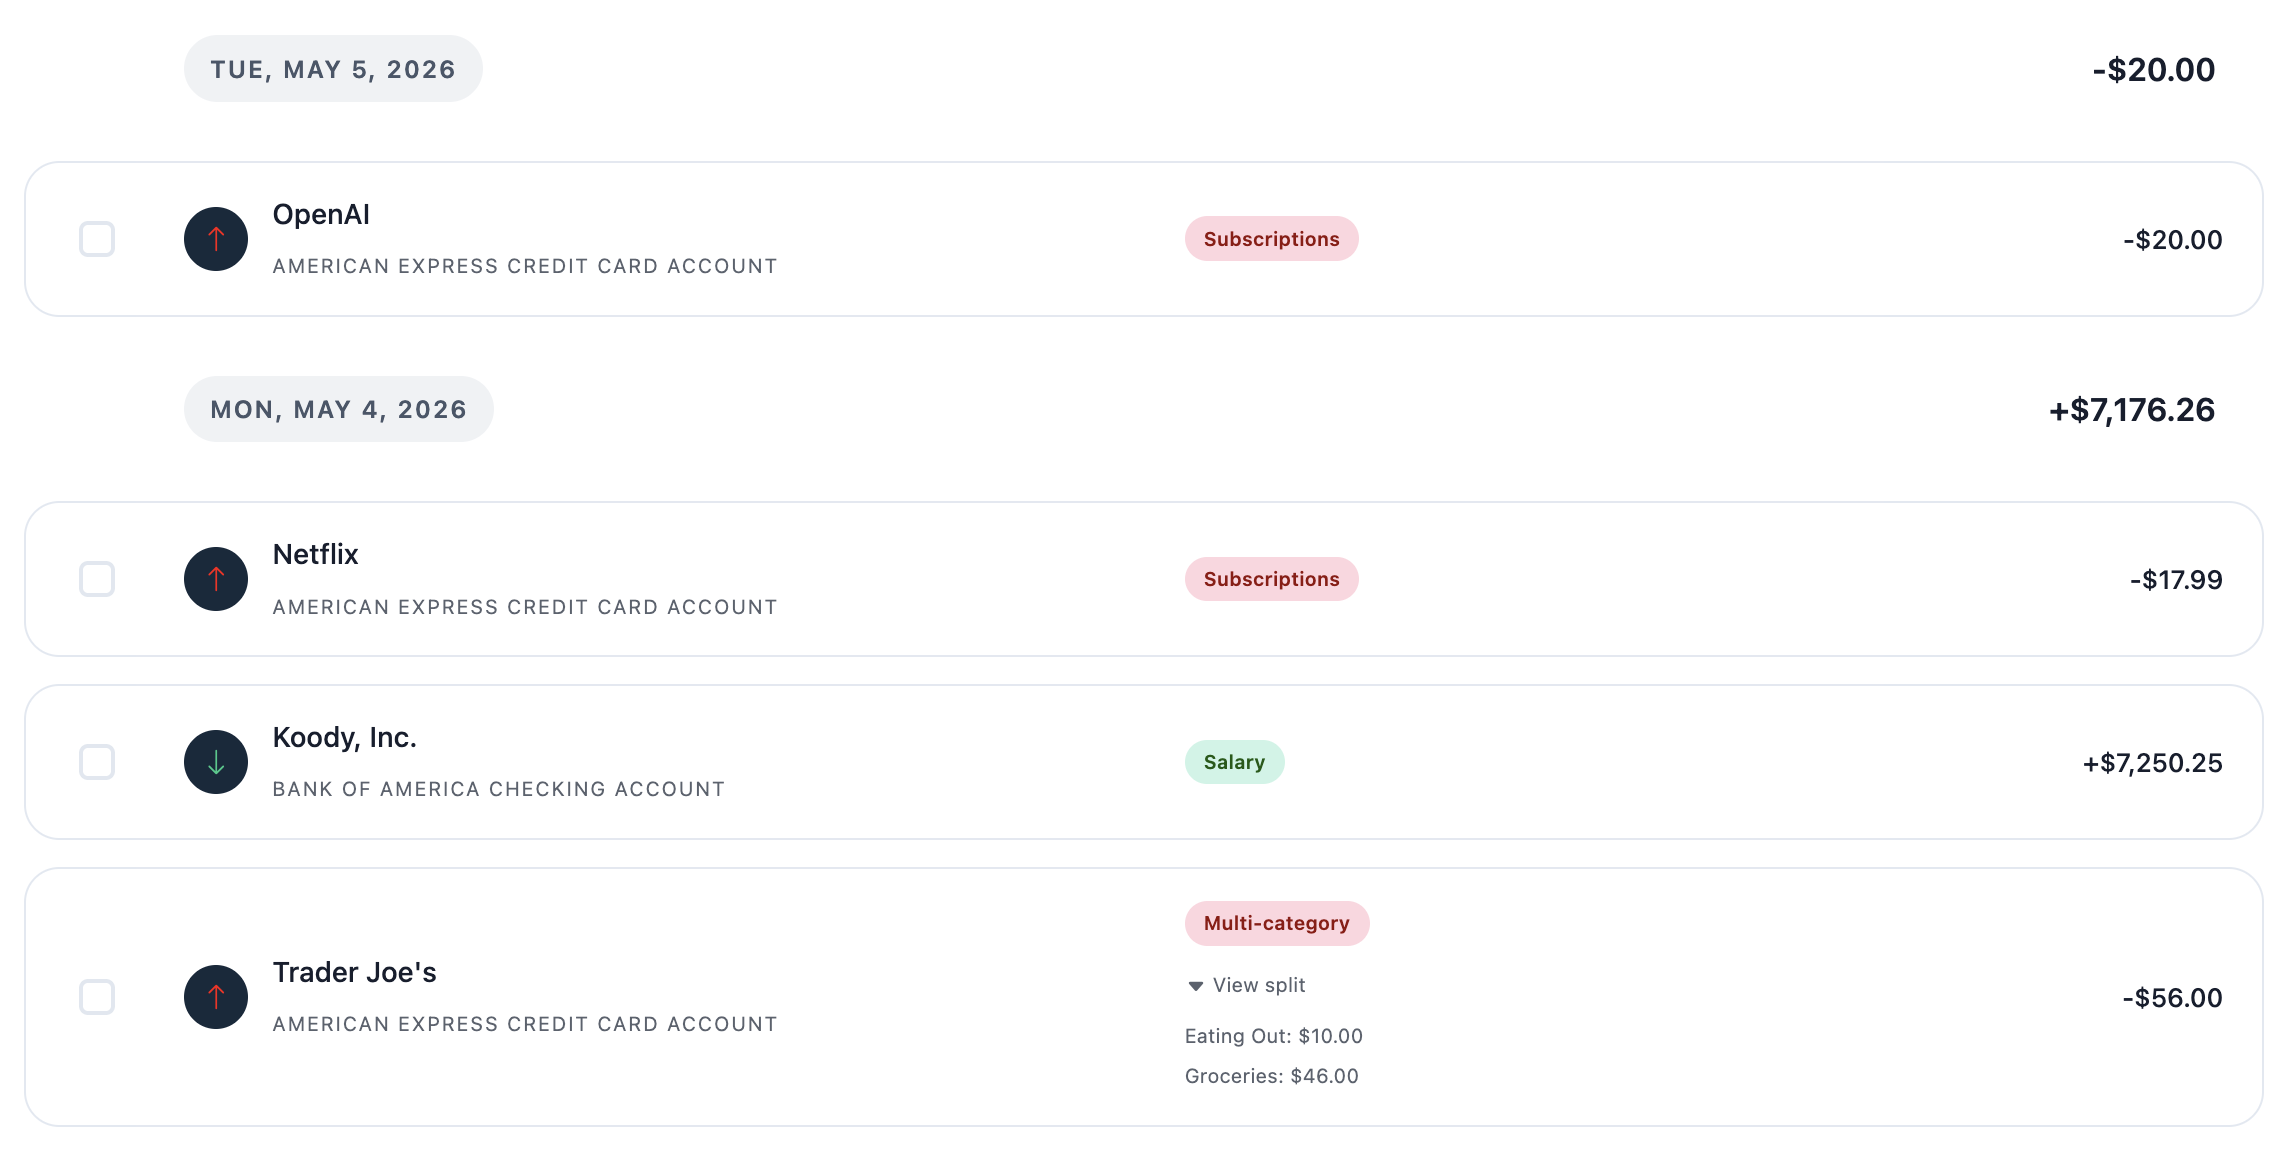
Koody turns imported rows into a cleaner transaction list you can review and edit.
The goal here is not perfection for its own sake. It is to make the major tax-relevant groups understandable: what was income, what was spending, what was a transfer, and what needs a receipt or follow-up note.
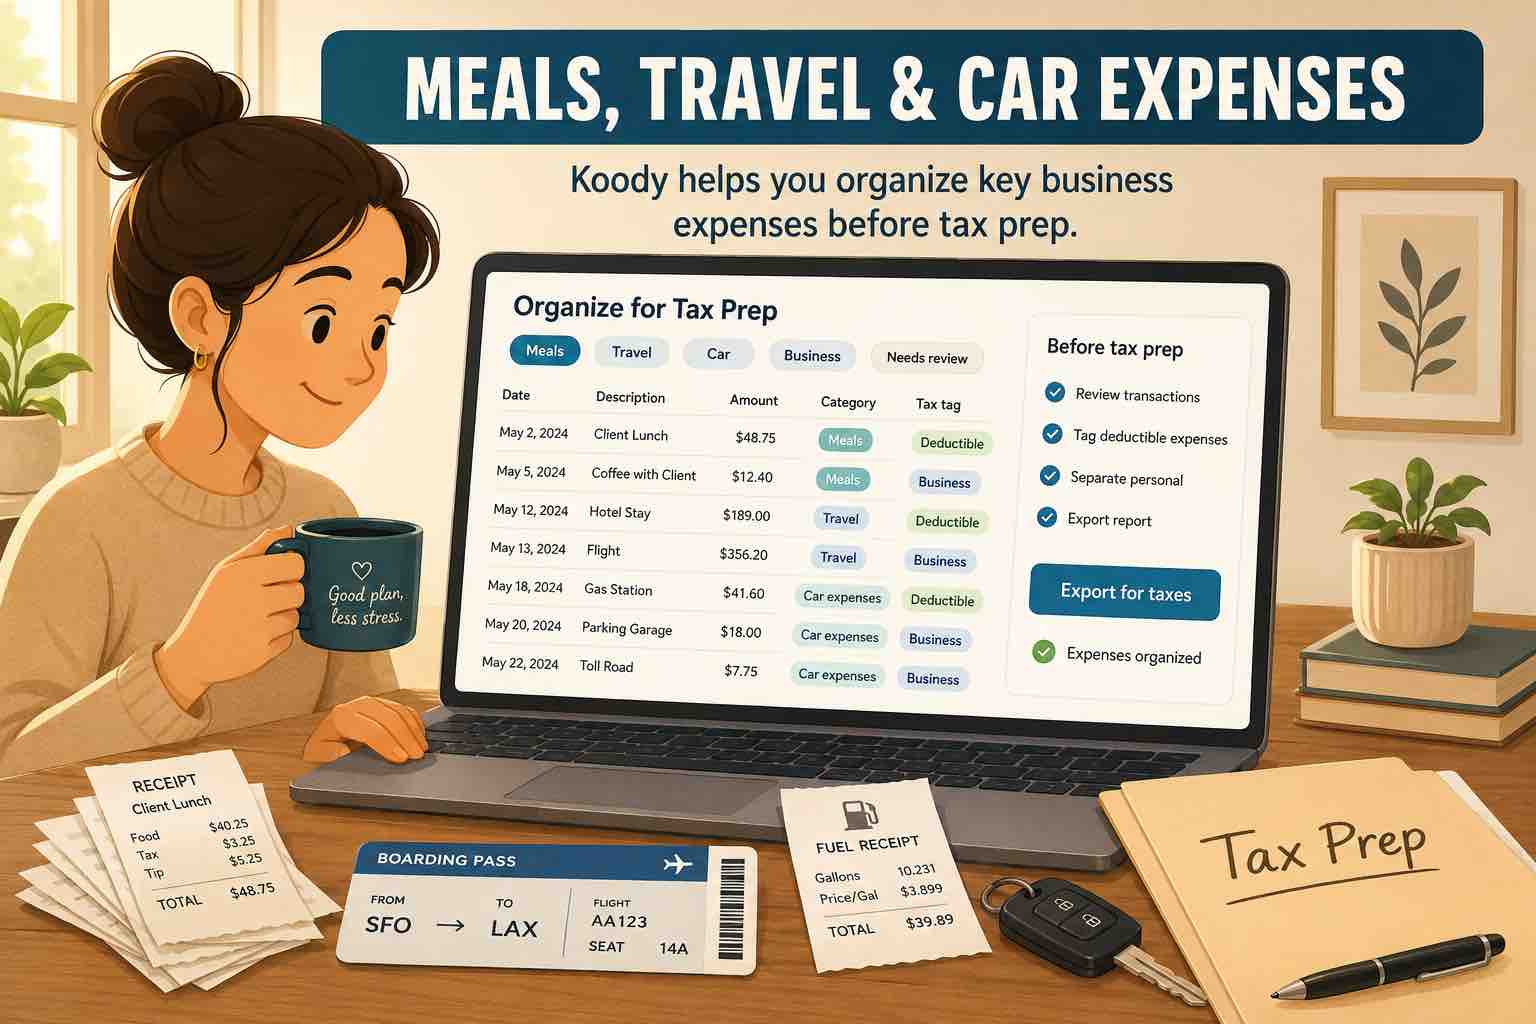
Step 3: Attach receipts and notes where they matter
Clean categories help. Supporting documents finish the job.
If there are expenses your accountant is likely to ask about, attach the receipt, PDF invoice, screenshot, or add a short note while the import is still fresh in your head. That is especially useful for freelance costs, reimbursements, large one-off purchases, travel, or anything that may need extra explanation later.
You do not need to attach a receipt to every coffee. Focus on the transactions where proof or context will save you time later. Koody keeps that proof right next to the expense instead of leaving it buried in an email or a downloads folder.
That matters because the supporting document is not always a paper receipt. Sometimes it is a vendor invoice, an emailed PDF, or a screenshot confirmation. In Koody, those files can stay attached to the matching transaction instead of living in a separate tax folder that no one wants to sort later.
Step 4: Export for your accountant or filing prep
Once the imports are clean, move to the Transactions tab and export only what your accountant actually needs.
Before exporting, set the filters that make the file useful:
Date range for the tax year or requested review period.
Specific bank or card accounts.
Expense-only or income-only views when appropriate.
Category filters for work costs, side-hustle spending, reimbursements, or similar groups.
Search terms when a preparer asks about one merchant or one type of transaction.
Then export as CSV, Excel (.xlsx), or JSON, or use Send to Accountant to email the file directly from Koody.
What matters most is handing off clean, categorized records with the right supporting documents. Whether you are sending the export to your accountant or getting your own tax filing records organized, the goal is the same: give yourself a usable transaction history instead of a raw bank export.
Avoid tax-prep import mistakes
A few common mistakes create most of the rework:
Mixing manual entries with imported history without checking for overlap.
Uploading multiple accounts into the wrong destination account.
Sending summary reports instead of transaction-level exports.
Leaving credit card payments mixed in with real spending.
Exporting before the big category cleanup is done.
Forgetting to attach receipts or notes for the transactions most likely to be questioned.
Resist the urge to rebuild your whole financial life. Import the accounts that matter, clean the important categories, attach the proof that matters, and export a file your accountant can use without another round of detective work.
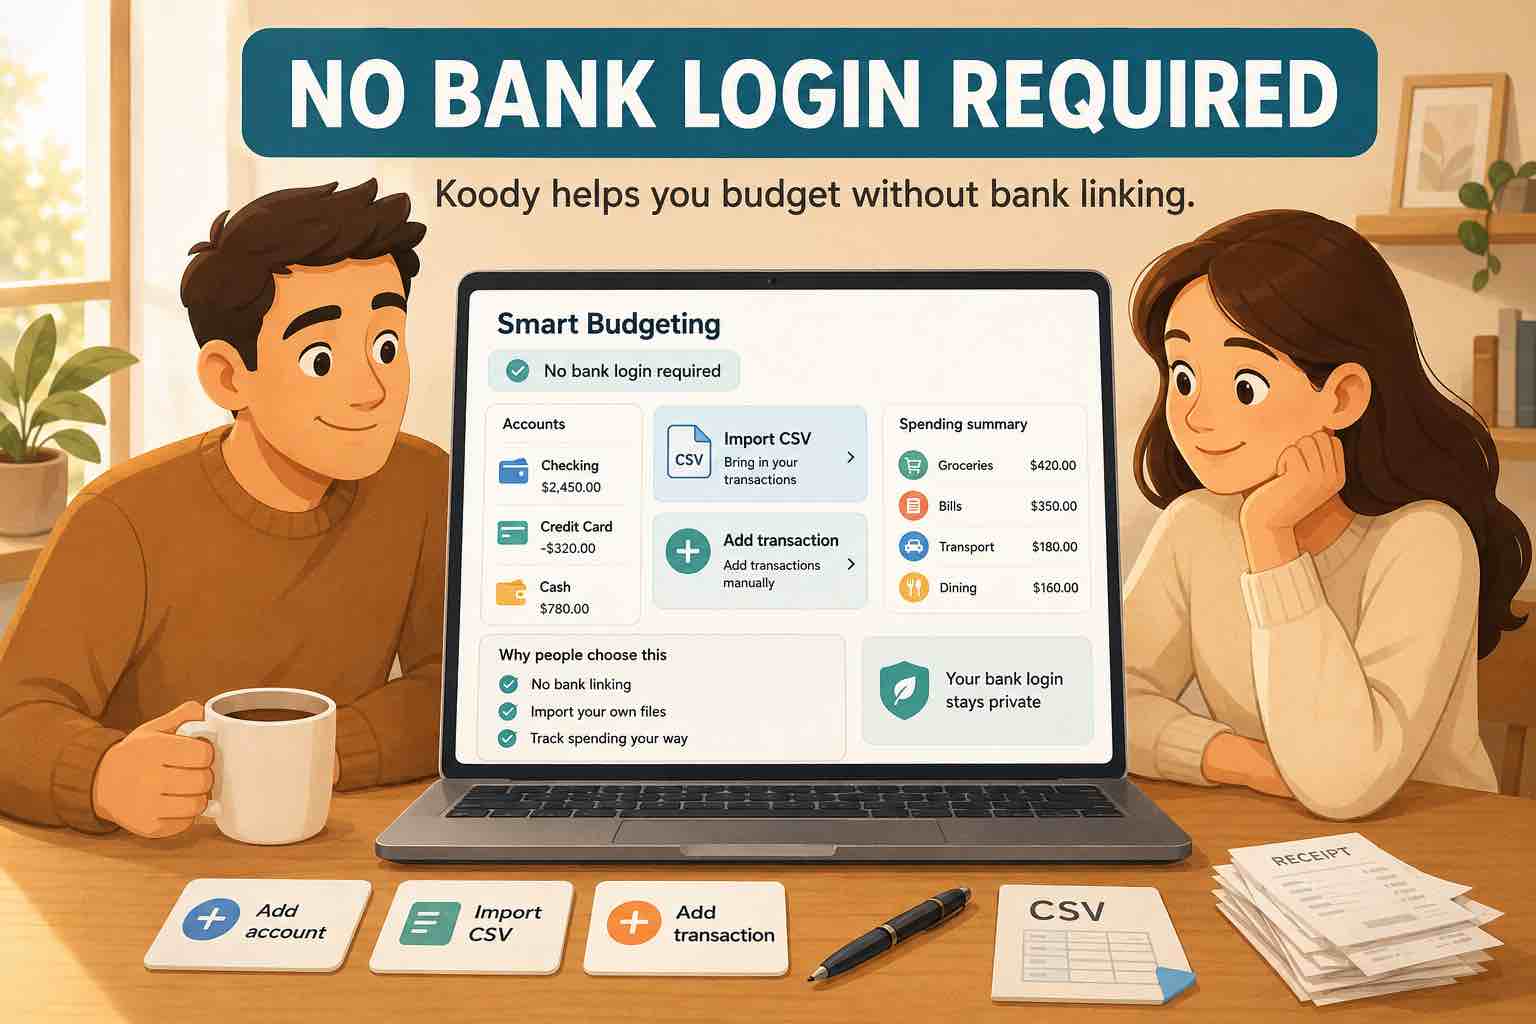
Organize tax-prep transactions without connecting your bank.
Bring in bank statement CSVs, credit card CSVs, and spreadsheet exports. Koody helps clean descriptions, auto-categorize transactions, check duplicates, bulk edit repeated patterns, attach receipts, and export clean records for your accountant.
1. Can I get tax-prep records ready in Koody without linking my bank?
Yes. Download CSVs or statements from your bank or credit card, import them into Koody, let Koody auto-categorize the transactions, review the results, and export what you need without turning on bank sync.
2. How should I categorize transactions for tax purposes?
Start by organizing transactions into practical review groups: income, expenses, transfers, refunds or reimbursements, personal spending, and items that need follow-up. Koody auto-categorizes imported transactions first, then you can review the tax-relevant items by merchant, category, account, and date range so your accountant can work through them faster. Koody helps with the organizing work, but your accountant or tax preparer should decide final tax treatment, deductions, and filing categories.
3. Can I use bank CSVs or Excel exports for tax prep?
Yes. Transaction-level bank CSVs and credit card exports are useful starting points for tax prep because they show dates, amounts, descriptions, and account activity. If your bank gives you an Excel file, you can usually save it as CSV before importing. Avoid summary reports when possible, because your accountant will usually need transaction-level detail, not just category totals.
4. How should I handle credit card payments and transfers before tax export?
Review credit card payments and transfers separately from actual purchases. A card payment is usually money moving between your own accounts, not a new deductible expense. Import each credit card into its matching Koody account, let Koody auto-categorize the card activity, then review purchases, refunds, payments, and transfers before exporting records for your accountant.
5. Can I send categorized transaction data to my accountant from Koody?
Yes. Once your transactions are imported and cleaned up, you can export a filtered date range and send it to your accountant from the Transactions tab.
6. Can Koody send my transaction data directly to the IRS?
Not yet. Koody helps you organize categorized records, receipts, and exports for tax prep, but it does not yet file tax forms or transmit records directly to the IRS.
7. What if most of my tax-related spending is on a credit card?
Import each credit card statement into the matching Koody account so purchases, refunds, and card payments are easier to review. This is usually much cleaner than trying to merge everything into one file first.
8. Do I need perfect categories before I export data for tax prep?
No, but you do want the important cleanup done first. Fix the major categories, review transfers and card payments, and attach receipts or notes for the items your accountant is most likely to question.
9. Which Koody plan fits this tax-prep setup?
Bank statement imports are included in the Plus plan. Transaction export and Send to Accountant are available on both Standard and Plus plans. Receipt upload is available on the Free plan.
If you need to categorize transactions for tax filing, start with one account and one clean date range instead of waiting for a perfect system.
Import the CSV intoKoody, clean the categories while the data is in front of you, and export a file your accountant can work with without another spreadsheet cleanup cycle.